I’ve been growing my own tomato seedlings for a couple decades now. There are a lot of new vegetable gardeners out there these days, and one of the first questions many ask is: what should I grow from seed indoors, what should I plant in the garden directly? Or do I want to buy seedlings and plant those?
Growing your own seedlings allows you to choose exactly the varieties you want. It doesn’t necessarily cost less than buying seedlings, and it certainly takes more time, but the work makes me happy in early spring while waiting for the soil to warm up and dry out. I don’t have a fancy set-up at all and the seedlings aren’t perfect, but they are healthy and happy enough to go into the garden and thrive.
This post will be a little photo journal of my growing tomato seedlings in 2021, so you can see how I do it.
February 28th: Start Seeds
This was too early for me. It’s about 8 weeks before our average last frost date, which is reasonable by the book if you want to end up with a really big tomato seedling in a big pot. But for me, the tomato plants get too big inside for the space I have. I should have started around March 10th – six weeks before last frost.
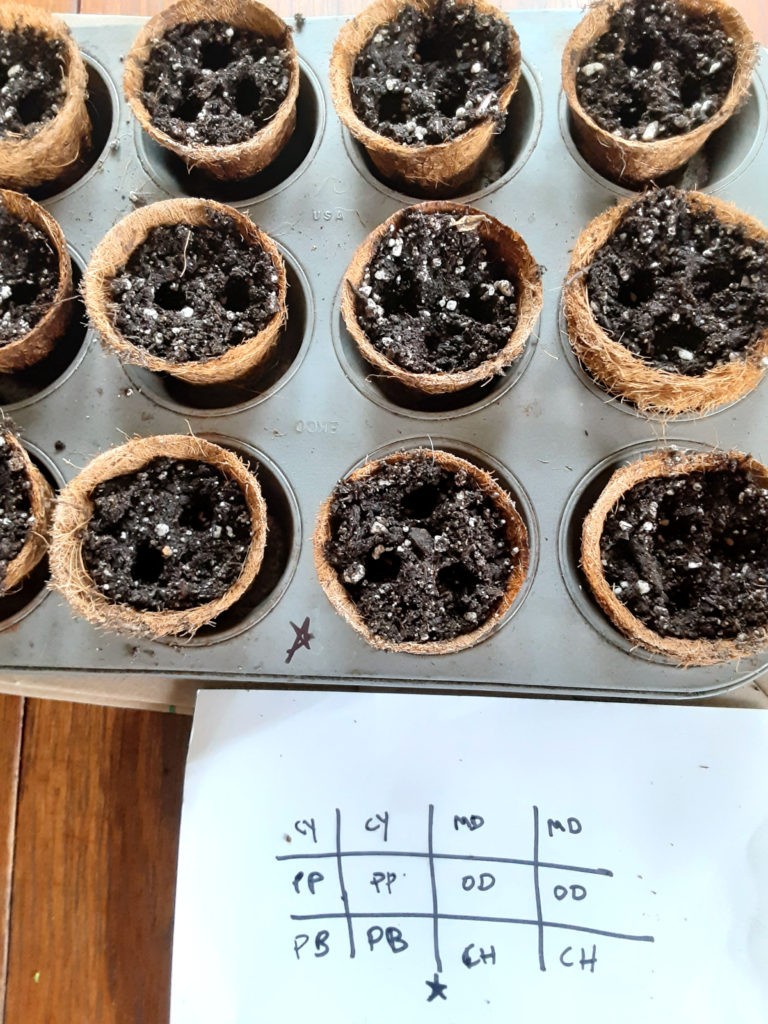
These are one inch round pots made of coconut fiber. I had them lying around left over from another year, so I used them for this. Other times, I’ve started the seeds first in shallow seedling trays, not pots. They don’t stay in here for long after they germinate, so what you use doesn’t so much matter at this stage.
I used McEnroe light mix as the soil medium to grow tomato seedlings. Always mix the soil well with room-temperature water before you put it in the pots. Soil mixes are sold dry and they repel water before they start absorbing it, and shrink a lot when they do it. Trust me: if you mix in the water first, everything goes better.
You can see I’ve poked three shallow holes (less than one-half inch) in the surface of each pot. I then put one tomato seed in each hole, tap a little soil over it, and water lightly again. My goal is for one, two, or three to germinate, and then keep the healthiest looking tomato seedlings in each pot.
Later, after I know how many tomato seedlings I’m keeping of each variety, I’ll make little labels for each plant so I can track which is which. At this stage, I made a little map of my muffin tin to know which seeds I planted where. In case you’re curious, the varieties I planted are: Crnkovic Yugoslav, Mountaineer Delight, Pink Berkeley, Prudens Purple, Odoriko, and Mountaineer Delight. The last one is a yellow cherry tomato that’s my own seed saving project.
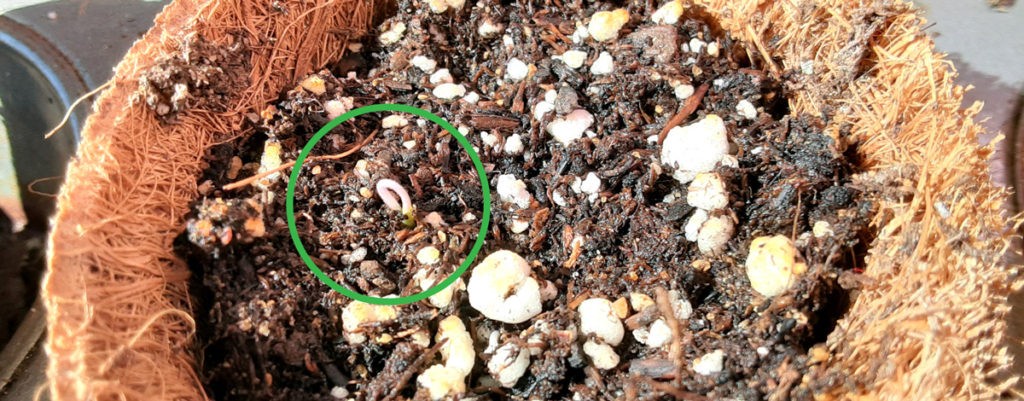
The tomato seedlings will take anywhere from 5-12 days to emerge. They don’t need any light at this stage and it’s best to keep them somewhere warm until you see the first signs of life, which is often away from the window where they’ll go eventually. This year I had them on a gentle low-power heating pad left over from my son’s hedgehog cage, so they came up a little faster. The first sign will be a little pale loop coming out of the dirt. here’s what it looks like.
Lights for Tomato Seedlings
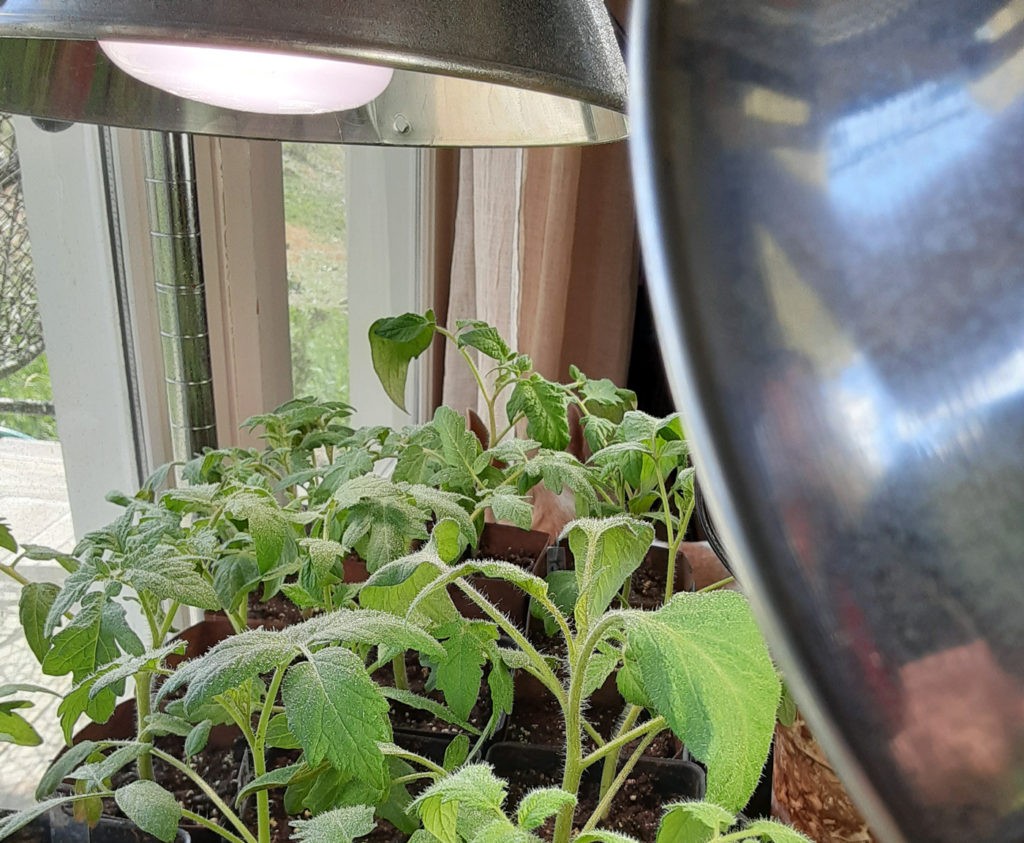
Once they emerge from the soil, indoor vegetable starts need extra light, there’s no way around it. I do it the cheap way so my plants still end up a little bit pale and leggy, not perfect. But if you just put tomato seedlings in a window with no added lighting, your seedlings will grow crazy-like searching for the light, and will end up tall with weak stems.
I use cheap clamp-on utility light fixtures with GE balanced spectrum LED grow light bulbs. Unlike a big shelf-sized lighting device, this allows me to put a few lights at different levels when I have bigger and smaller plants on the same shelf at the same time. The lights should be 6-12 inches away from the plants, in my experience.
Some people grow seedlings in a basement or garage, and then you probably need more light than I use. I have a big glass door that gets strong light most of the day, so my tomato seedlings get a mix of natural and artificial light.
How Much Water Do Tomato Seedlings Need?
Throughout their growth, you want to be careful to not overwater. This has been a mistake over the years. If the soil remains totally saturated with water, the plant roots can’t get as much nutrition from the soil. But you also don’t want the dirt to get completely bone-dry. When this happens, the plant will suffer stress, and it also becomes very hard to rewet the completely dry components of seedling soil, like peat and vermiculite. When these get completely dry, the water runs right off of them. So, let your soil dry down to barely damp, then water well. Repeat. Paper, peat, or fiber pots will dry out faster than plastic pots.
March 18th: The First Re-Potting
Once tomato plants have their first true leaves, it’s time to move them. You may have read this advice before and wondered: what are true leaves? They first ‘leaves’ that emerge on the stem are technically called cotyledons. They are long and skinny and not shaped like a tomato leaf. Here’s a photo. This shows an unusual plant in that it grew three-sided instead of two-sided like most tomatoes, but it’s a good image to show you the difference.
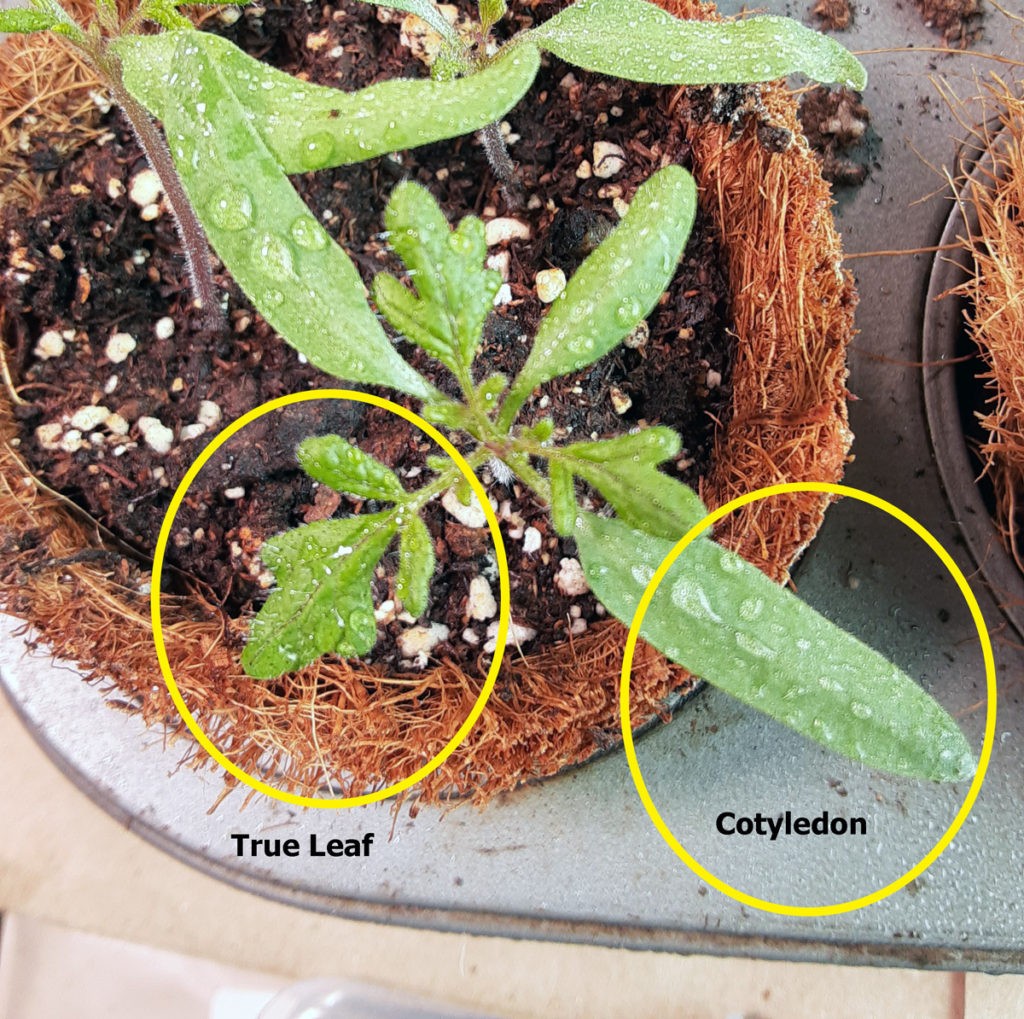
This year, getting to this point took about 2 1/2 weeks, half of that for the seedlings to first emerge, and the other half to grow to the right size. At this point, we’ve got the young tomato seedlings too crowded, either in seed-starting trays or multiple in one pot, as I’ve done. The idea is to move each plant to its own little pot and set it lower in the soil to encourage a strong stem and good roots.
Normally I’d be moving the plants from a flat tray into one inch pots. This year, I didn’t use seedling trays and just started three seeds per pot. So, some of these plants I moved out to new pots, and others I just reset lower with some new dirt in the pot it was already planted in.
I like to do this in the evening so the plants can rest in darkness after transplanting. I don’t know if that makes any difference.
To repot tomato seedlings the first time:
- Mix new soil with water and put some in the bottom of each new pot. I use one inch pots or one inch 4-pack or 6-pack plastic trays (like annual flower starts are sold in) at this stage.
- Wet the plants, fully saturating the soil.
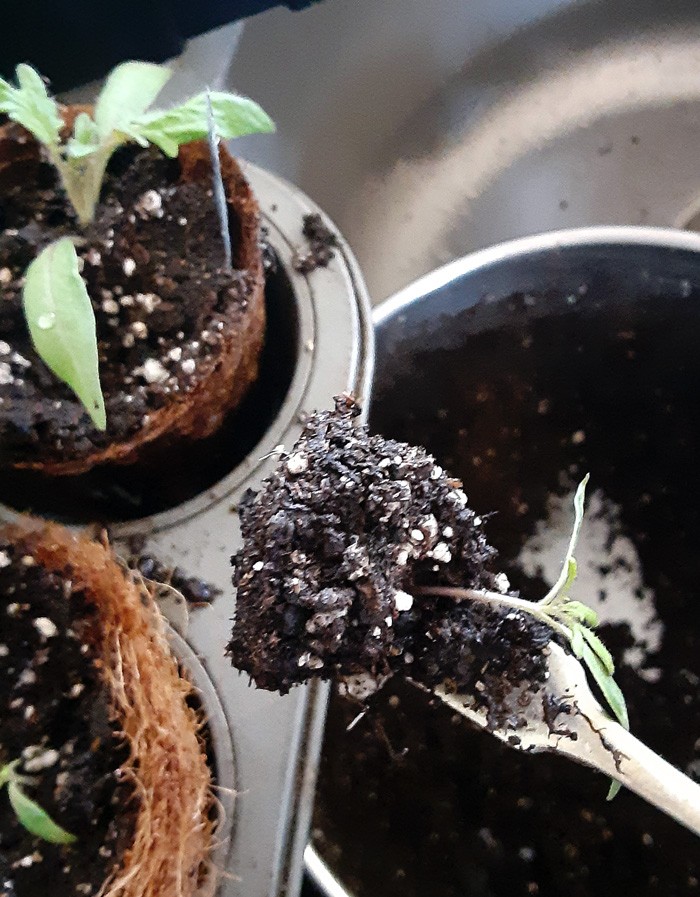
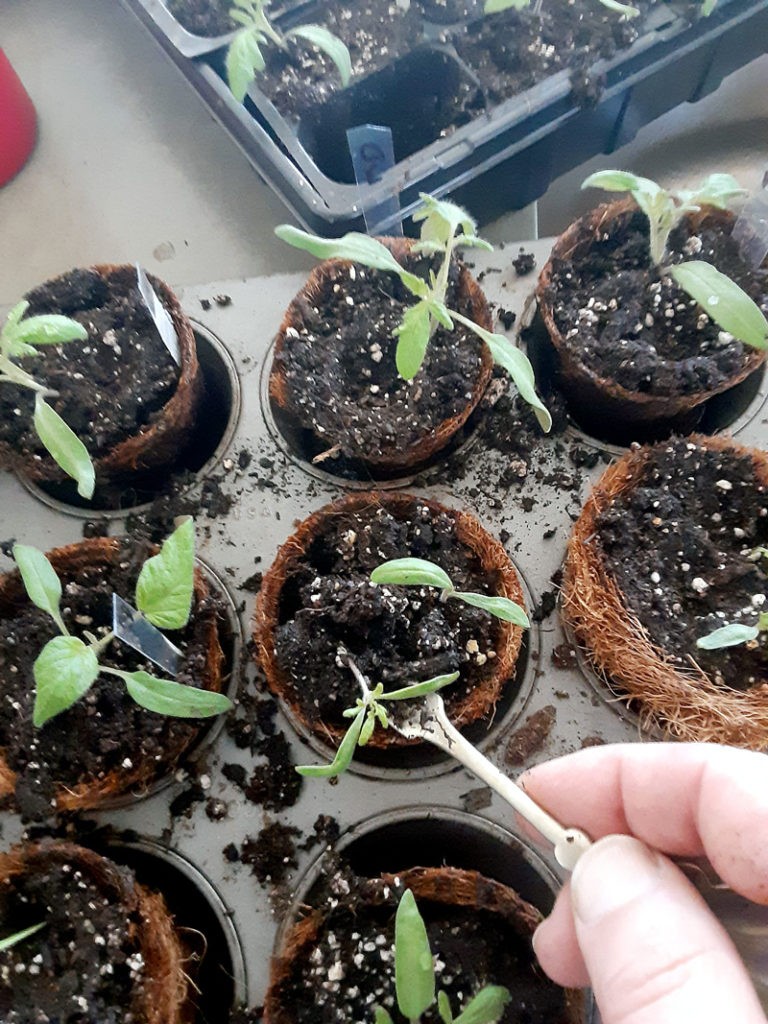
- Poke a blunt object like a butter knife all the way down under the soil to lift out each plant by its roots. If it’s entangled with a neighbor’s roots, gently separate them.
- Lift the plant and set on the new soil. If you need to handle a tiny tomato seedling, do it by the leaves, not the stem. Handling the stem can damage it.
- Note: your goal is to set the plant lower in the soil than it was before. It’s great if only the true leaves are above the soil. Some people break off the cotyledons, or just bury them.
- Carefully place more new soil around your seedling and press down gently. Water.
Carefully lift out, including the soil around the roots. Repotting tomato seedlings.
What’s Next?
This is the first post of two. We’ll get the plants into bigger pots and then outside into the dirt, next time.

